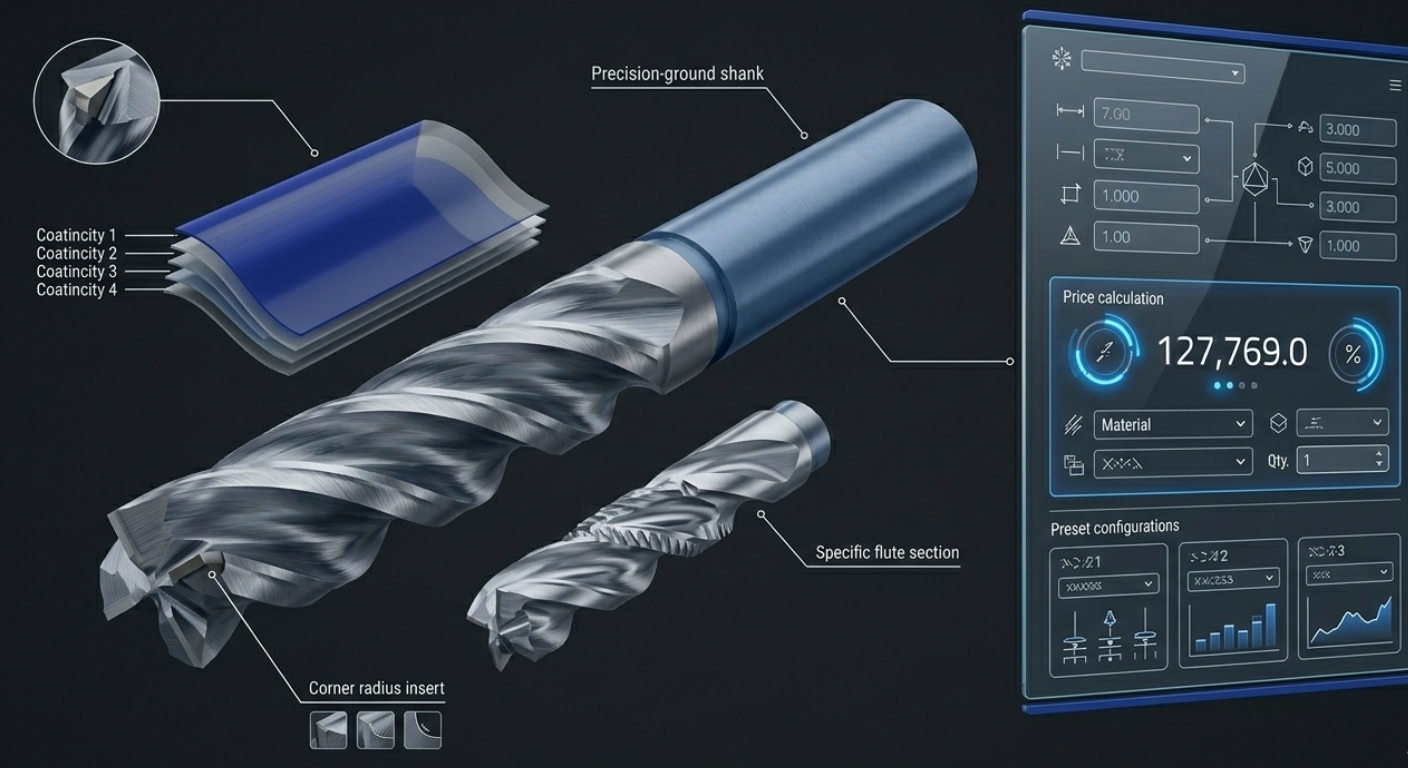
Featured Image Prompt: An exploded technical view of a custom carbide end mill showing each component and parameter - flute geometry, shank, coating layer, corner radius - with clean white annotation lines connecting to a floating digital UI panel showing dropdown selectors, dimension inputs, and a live price calculation. Dark charcoal background, precise technical illustration meets modern UI design.
Custom cutting tools are among the most complex products to configure and quote. With dozens of interdependent parameters - geometry, material, coating, tolerance, and application - the number of valid combinations can run into the millions. Building a product configurator that handles this complexity while remaining intuitive for sales teams and customers is both a technical and a business challenge.
This guide walks through the practical steps of building a configurator for custom cutting tools using a CPQ platform.
Step 1: Map your product parameters
Before touching any software, document every configurable parameter for your cutting tool families. For a typical solid carbide end mill, this might include:
Geometry parameters:
- Diameter (0.1mm to 25mm)
- Number of flutes (2, 3, 4, 5, 6)
- Helix angle (30, 35, 38, 40, 45 degrees)
- Overall length (standard, long, extra-long)
- Flute length (as a ratio of diameter)
- Corner treatment (sharp, chamfer, radius)
- Corner radius value (if radius selected)
Material and coating:
- Substrate (micro-grain carbide, sub-micron carbide, nano-grain carbide)
- Coating (TiAlN, AlCrN, TiSiN, nACo, DLC, uncoated)
Interface:
- Shank type (cylindrical h6, HA, Weldon, HSK)
- Shank diameter (if different from cutting diameter)
Application context:
- Target workpiece material (steel, stainless, aluminium, titanium, hardened steel)
- Operation type (roughing, finishing, high-speed, plunging)
"The most common mistake in configurator design is trying to expose every possible parameter. Start with the parameters that drive 80% of your orders, and handle the remaining 20% as custom requests." - Industry CPQ implementation consultant
Step 2: Define your configuration rules
This is the most critical step. Configuration rules prevent invalid combinations and guide users toward optimal selections.
Compatibility rules
These define what can and cannot be combined:
- Material-coating compatibility - DLC coating cannot be applied to tools for ferrous materials (chemical reaction at temperature)
- Geometry constraints - A 0.5mm diameter tool cannot have 6 flutes (physically impossible)
- Length ratios - Flute length cannot exceed 5x diameter for solid carbide without special design
- Tolerance-process dependencies - h5 tolerance on the shank requires centreless grinding (affects cost and lead time)
Recommendation rules
These suggest optimal configurations without enforcing them:
- For aluminium machining, recommend 2-3 flutes with DLC coating and 45-degree helix
- For hardened steel above 55 HRC, recommend 4-6 flutes with AlCrN coating and 35-degree helix
- For long-reach applications, recommend reduced neck diameter for rigidity
Dependency rules
These automatically adjust one parameter when another changes:
- Selecting PCD substrate automatically limits coating to uncoated or diamond-like options
- Choosing micro-diameter (below 1mm) adjusts available flute counts and length ratios
- Selecting a Weldon shank adjusts the minimum shank diameter
"Good configuration rules are the difference between a configurator that frustrates users with constant error messages and one that guides them naturally toward valid, optimal selections." - Manufacturing CPQ Best Practices, Gartner
Step 3: Build your cost model
For cutting tools, pricing should be calculated from manufacturing cost, not from a static price list. A robust cost model includes:
Raw material cost
Material cost = bar diameter x bar length x material price per mm3 + waste factor (typically 15-30% for carbide blanks)
Material prices should update from supplier feeds or be manually refreshable.
Manufacturing cost per operation
Map each operation in the manufacturing sequence and calculate cost:
- Blank preparation - cutting, centreless grinding (time based on diameter)
- Flute grinding - time based on flute count, helix angle, length, and diameter
- Gash grinding - time based on geometry complexity
- Relief grinding - fixed time per flute
- Shank finishing - time based on tolerance class
- Inspection - time based on tolerance class and number of measured dimensions
Each operation has a machine hourly rate that includes depreciation, labour, consumables, and overhead.
Coating cost
Coating is typically batch-processed. Cost per tool depends on:
- Coating type (materials and process time)
- Batch size (setup cost amortised across the batch)
- Tool surface area (affects coating material consumption)
Markup and margin
Apply configurable margin rules:
- Standard margin by product family
- Volume-based discounts with floor margins
- Customer-specific pricing agreements
- Rush delivery premiums
Step 4: Design the user interface
The configurator interface should match your users' mental model. For cutting tools, this typically means:
Progressive disclosure
Don't show all parameters at once. Guide users through a logical sequence:
- Application context - What are you cutting? What operation?
- Geometry - Diameter, length, flute count (with AI-recommended defaults based on application)
- Material and coating - Substrate and coating (filtered to valid options)
- Interface - Shank type and diameter
- Review and price - Summary with calculated price and lead time
Visual feedback
Show a schematic or parametric drawing that updates as parameters change. For cutting tools, a 2D profile view showing the flute geometry, overall dimensions, and shank is often more useful than a 3D render.
"In our testing, configurators with real-time visual feedback had 40% fewer configuration errors and 25% shorter configuration times compared to form-only interfaces." - UX research, Manufacturing configurator study
Step 5: Test with real scenarios
Before launch, validate the configurator against:
- Historical quotes - Can the system reproduce your last 100 quotes within an acceptable tolerance?
- Edge cases - Does it handle micro-diameter tools, extra-long reach, and unusual material combinations correctly?
- Pricing accuracy - Compare CPQ-calculated prices against manual estimates from your best estimator
- User testing - Have sales reps and customers try the configurator and note where they get stuck
Step 6: Launch and iterate
Start with a single product family. Collect feedback. Refine rules and pricing. Then expand to the next family. Each iteration gets easier because you've already built the framework.
The goal isn't perfection at launch - it's a system that's already better than spreadsheets on day one and gets smarter every week.
Kabaido makes building cutting tool configurators straightforward. Our CPQ platform handles complex rules, cost-driven pricing, and visual configuration out of the box. See a demo or start building today.